Result of the importer
Concept
| Description | The onResults provides the imported data as an array object containing a JSON object for each submitted row. The keys of each JSON object correspond to those defined in the Target Data Model, and the values are taken from the review step. The data types of these values can be strings, integers, floats, or booleans, as specified in the columnType of each target data model column. |
With this callback function, you can process, transform and send the returned data to your preferred API endpoint. You can find a code example showing the best practice for handling asynchronous server calls inside the onResults function here. | |
| Run event | The execution of this function occurs after the user clicks the "Complete import" button inside the review step |
| Parameters | results: This provides you with a JSON array, each object representing a submitted row, keyed and valued according to your schema and validations |
errors: This provides a JSON array, each object representing a row containing at least one error message when the user submits the data | |
complete: Calling this function triggers the success modal that is displayed to the user at the end of the import. The function accepts an object with importedRows and failedRows properties to customize the import summary (shown when successModalConfiguration.importSummary is set to true). If no parameters are provided, defaults are used based on the results and errors arrays. | |
logs: After the mapping step is completed as well as after the import process concludes, you have access to logs containing details about mappings and columns used during the import.
| |
block: Calling this function shows an error modal that blocks the user from finalizing the import process (similar as inside the callbacks of stepHandler). |
Outside of your testing phase, onResults only returns the first 100 rows when using the dev license key. Please reach out to [email protected] for more information.
| Example | In the example below, you can see what the data of results, errors and logs can look like |
- results
- errors
- logs
[
  {
    customer_code: "2345678954",
    customer_name: "Nuvo GmbH",
    domain_name: "getnuvo.com",
    address: "Schoeneberger Allee 6",
    region: "Hamburg, Germany",
    deal_size: 10000,
    deal_stage: "Follow Up",
    pipeline: "Pipeline Nr.1",
    deal_ongoing: true,
  },
  {
    customer_code: "2345678955",
    customer_name: "ComDocks Ltd.",
    domain_name: "www.comdocks.com",
    address: "Suedring 28",
    region: "Berlin, Germany",
    deal_size: 25000,
    deal_stage: "Lead",
    pipeline: "Pipeline Nr.2",
    deal_ongoing: false,
  },
  {
    customer_code: "2345678956",
    customer_name: "Nuvo GmbH",
    domain_name: "getnuvo.com",
    address: "Garden Street 12",
    region: "New York, US",
    deal_size: 30000,
    deal_stage: "Follow Up",
    pipeline: "Pipeline Nr.1",
    deal_ongoing: true,
  },
];
[
  {
    customer_code: {
      value: "2345678954",
      info: [
        {
          message: "Id exists in the database",
          level: "error",
        },
      ],
    },
    customer_name: {
      value: "",
      info: [
        {
          message: "Customer Name is required",
          level: "error",
        },
      ],
    },
    domain_name: {
      value: "getnuvo.com",
      info: [],
    },
    address: {
      value: "Schoeneberger Allee 6",
      info: [],
    },
    region: {
      value: "Hamburg, Germany",
      info: [],
    },
    deal_size: {
      value: 10000,
      info: [],
    },
    deal_stage: {
      value: "Follow Up",
      info: [
        {
          message: "This Deal Stage is not allowed",
          level: "error",
        },
      ],
    },
    pipeline: {
      value: "Pipeline Nr.1",
      info: [],
    },
    deal_ongoing: {
      value: true,
      info: [],
    },
  },
];
{
  "mappings": [
    {
      "sourceColumn": "Company Identification Number", // input column
      "targetColumn": "company_code" // matched Target Data Model column
    },
    {
      "sourceColumn": "Status",
      "targetColumn": "deal_status",
      "options": [ // when this is a category column (columnType === "category", "currency_code", "country_code_alpha_2" or "country_code_alpha_3"
        {
          "sourceValue": "In progress", // input value
          "targetOptions": ["Ongoing", ...] // matched Target Data Model dropdown option (can contain multiple strings when isMultiSelect === true)
        },
        {
          "sourceValue": "TBD",
          "targetOptions": [] // when being unmatched
        }
      ]
    },
    {
      "sourceColumn": "",
      "targetColumn": "address"
    }, ...
  ],
  "columns": {
    "addedColumns": [
      {
        "label": "Revenue",
        "key": "revenue",
        "columnType": "currency_eur"
      }
    ],
    "addedOptions": [
      {
        "columnKey": "deal_status",
        "dropdownOptions": [
          {
            "label": "Done",
            "value": "done",
            "type": "string"
          }
        ]
      }
    ]
  }
}
Handling errors and success
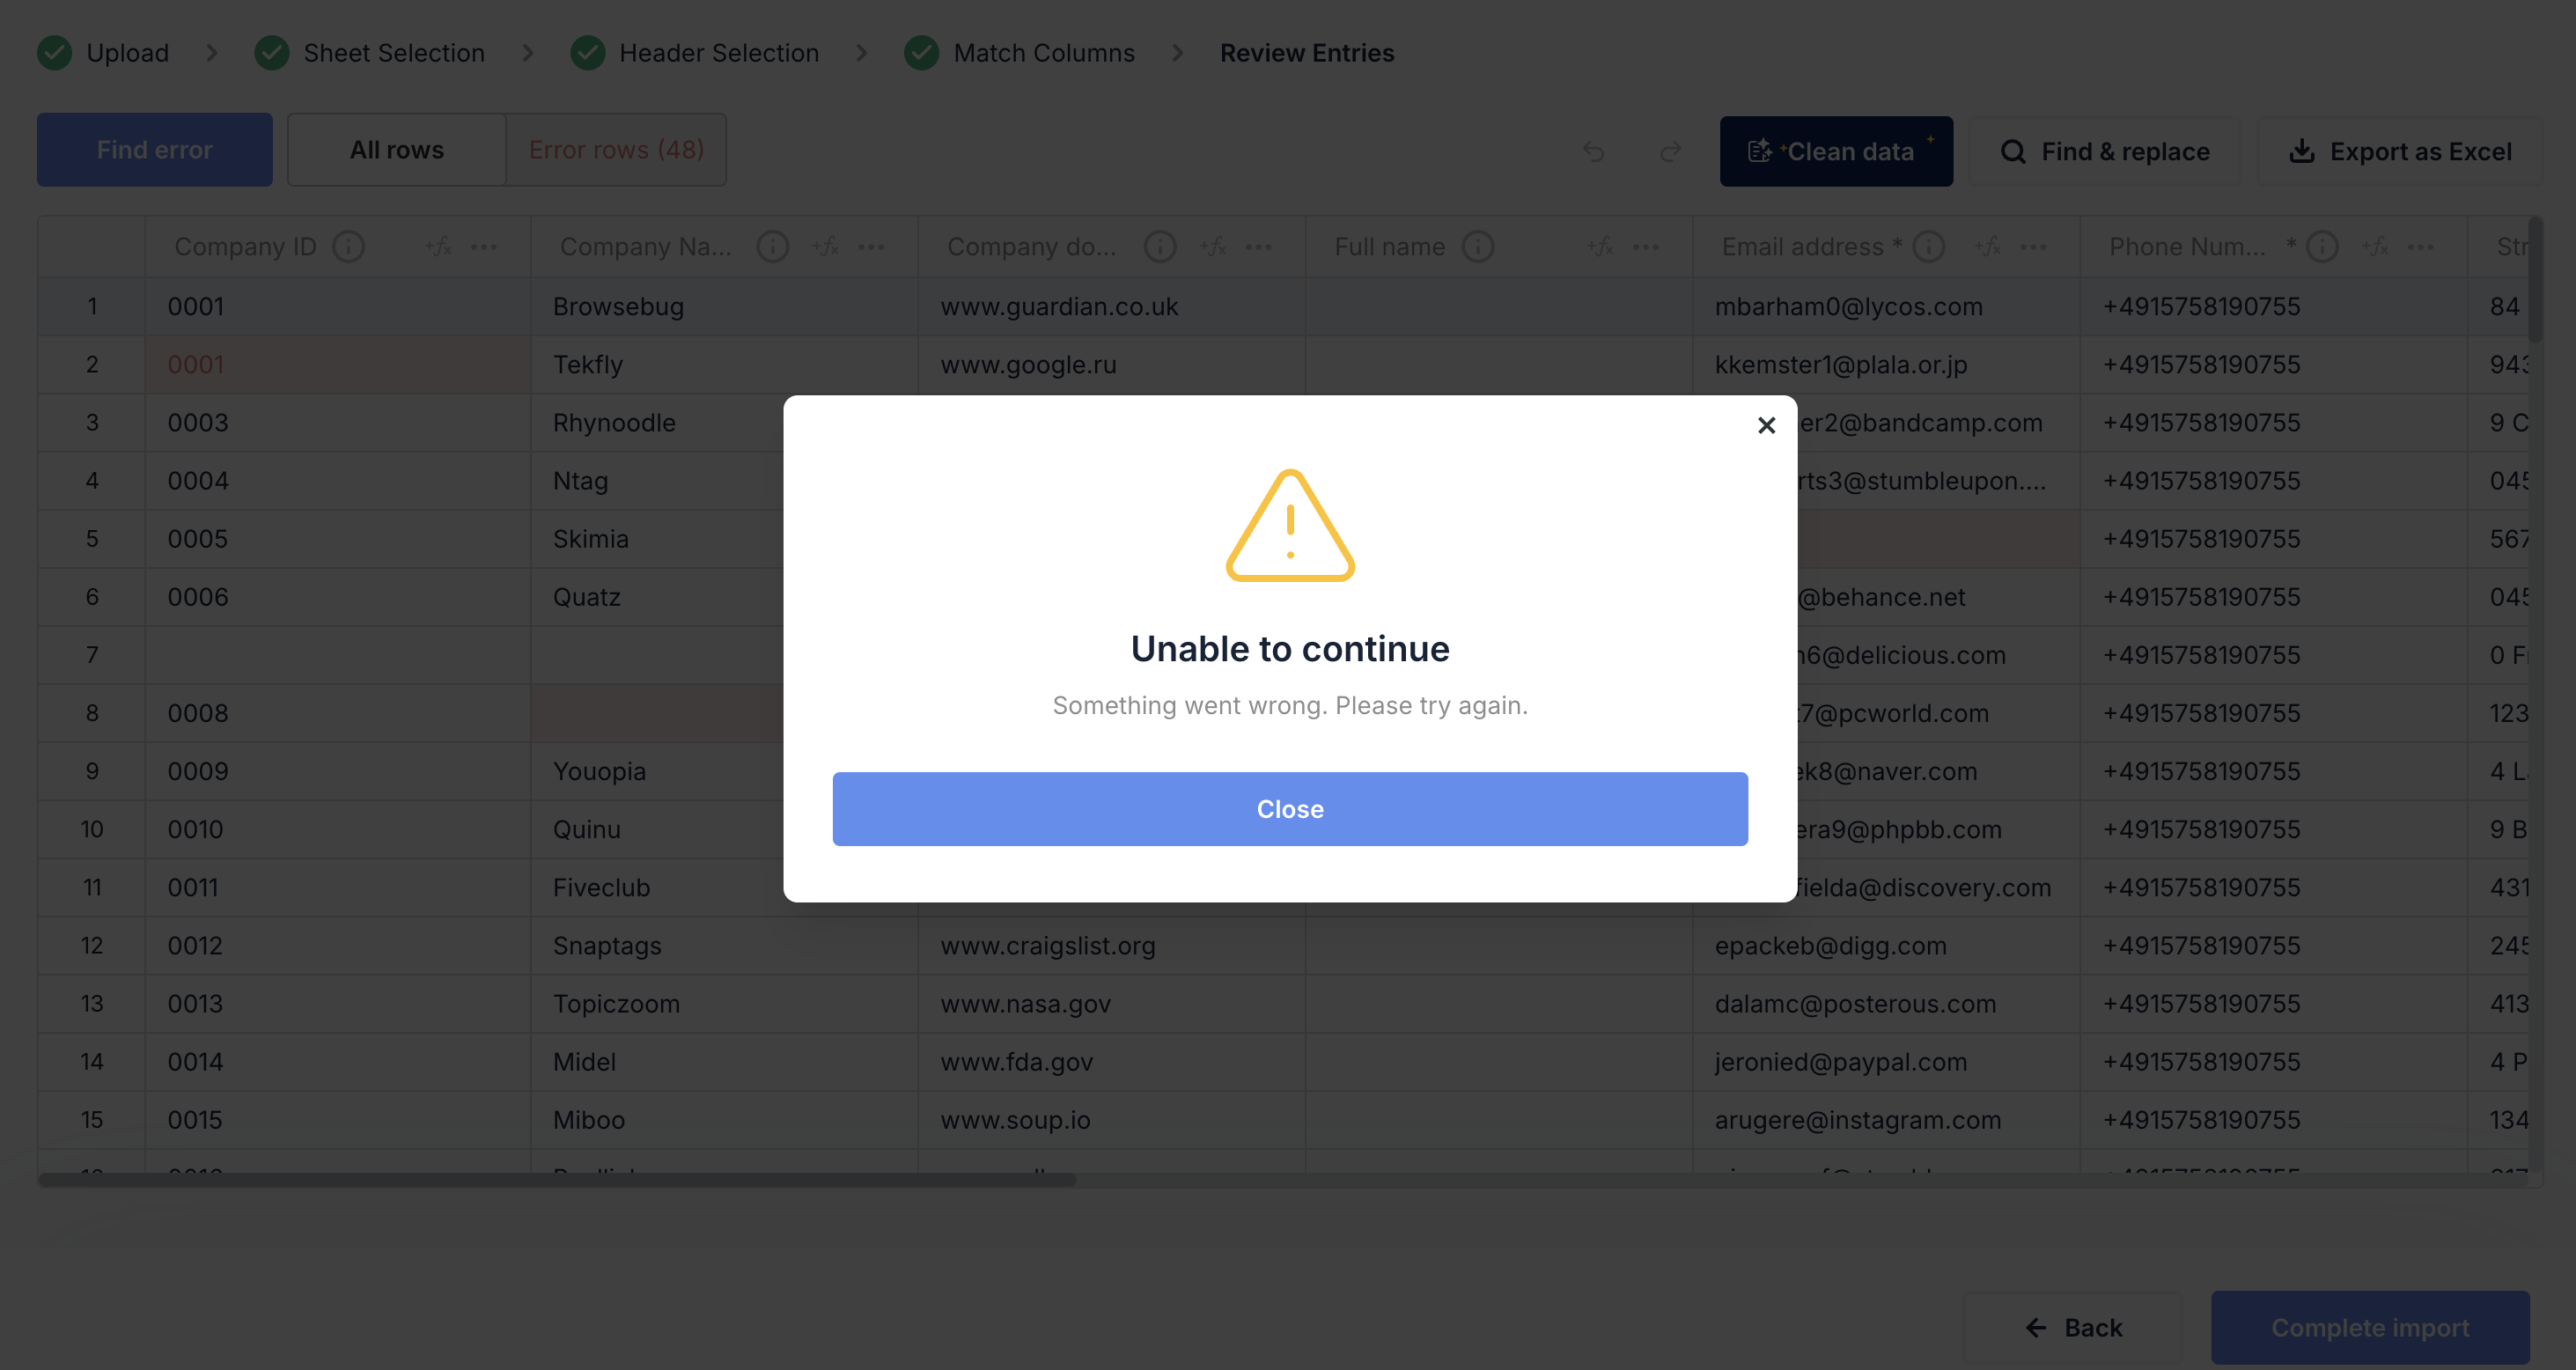
Handling errors with block()
Description:
Function to show a customizable error modal that blocks the import process. The modal's text elements can be customized via its parameters (see below), and the icon can be replaced or removed via style, similar to styling the rest of this modal. Clicking the close button returns the user to the review step.
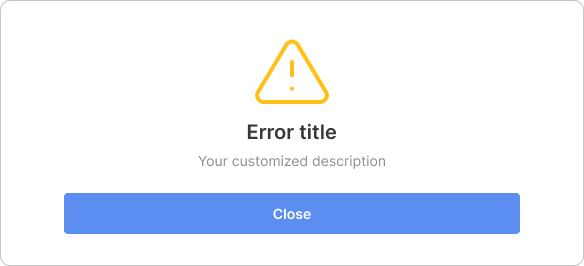
Error modal:
Parameters:
- title: Title of the modal (default: "Unable to continue")
- description: Description text explaining the error (default: "Something went wrong. Please try again.")
- closeButton: Text for the close button (default: "Close")
Example:
onResults={(results, errors, complete, logs, block) => {
  // Check for negative quantities
  if (results.some(row => row.quantity < 0)) {
    block({
      title: "Invalid Quantity Detected",
      description: "One or more rows contain negative quantities. Please correct the data and try again.",
      closeButton: "Fix Data"
    });
    return;
  }

  // Continue with normal processing
  complete();
}}
For custom validations that require server calls to your backend or need to provide cell-specific error messages, we recommend using stepHandler.reviewStep(). This hook allows you to execute custom logic and add cell-specific error/warning/info messages before the user submits their data.
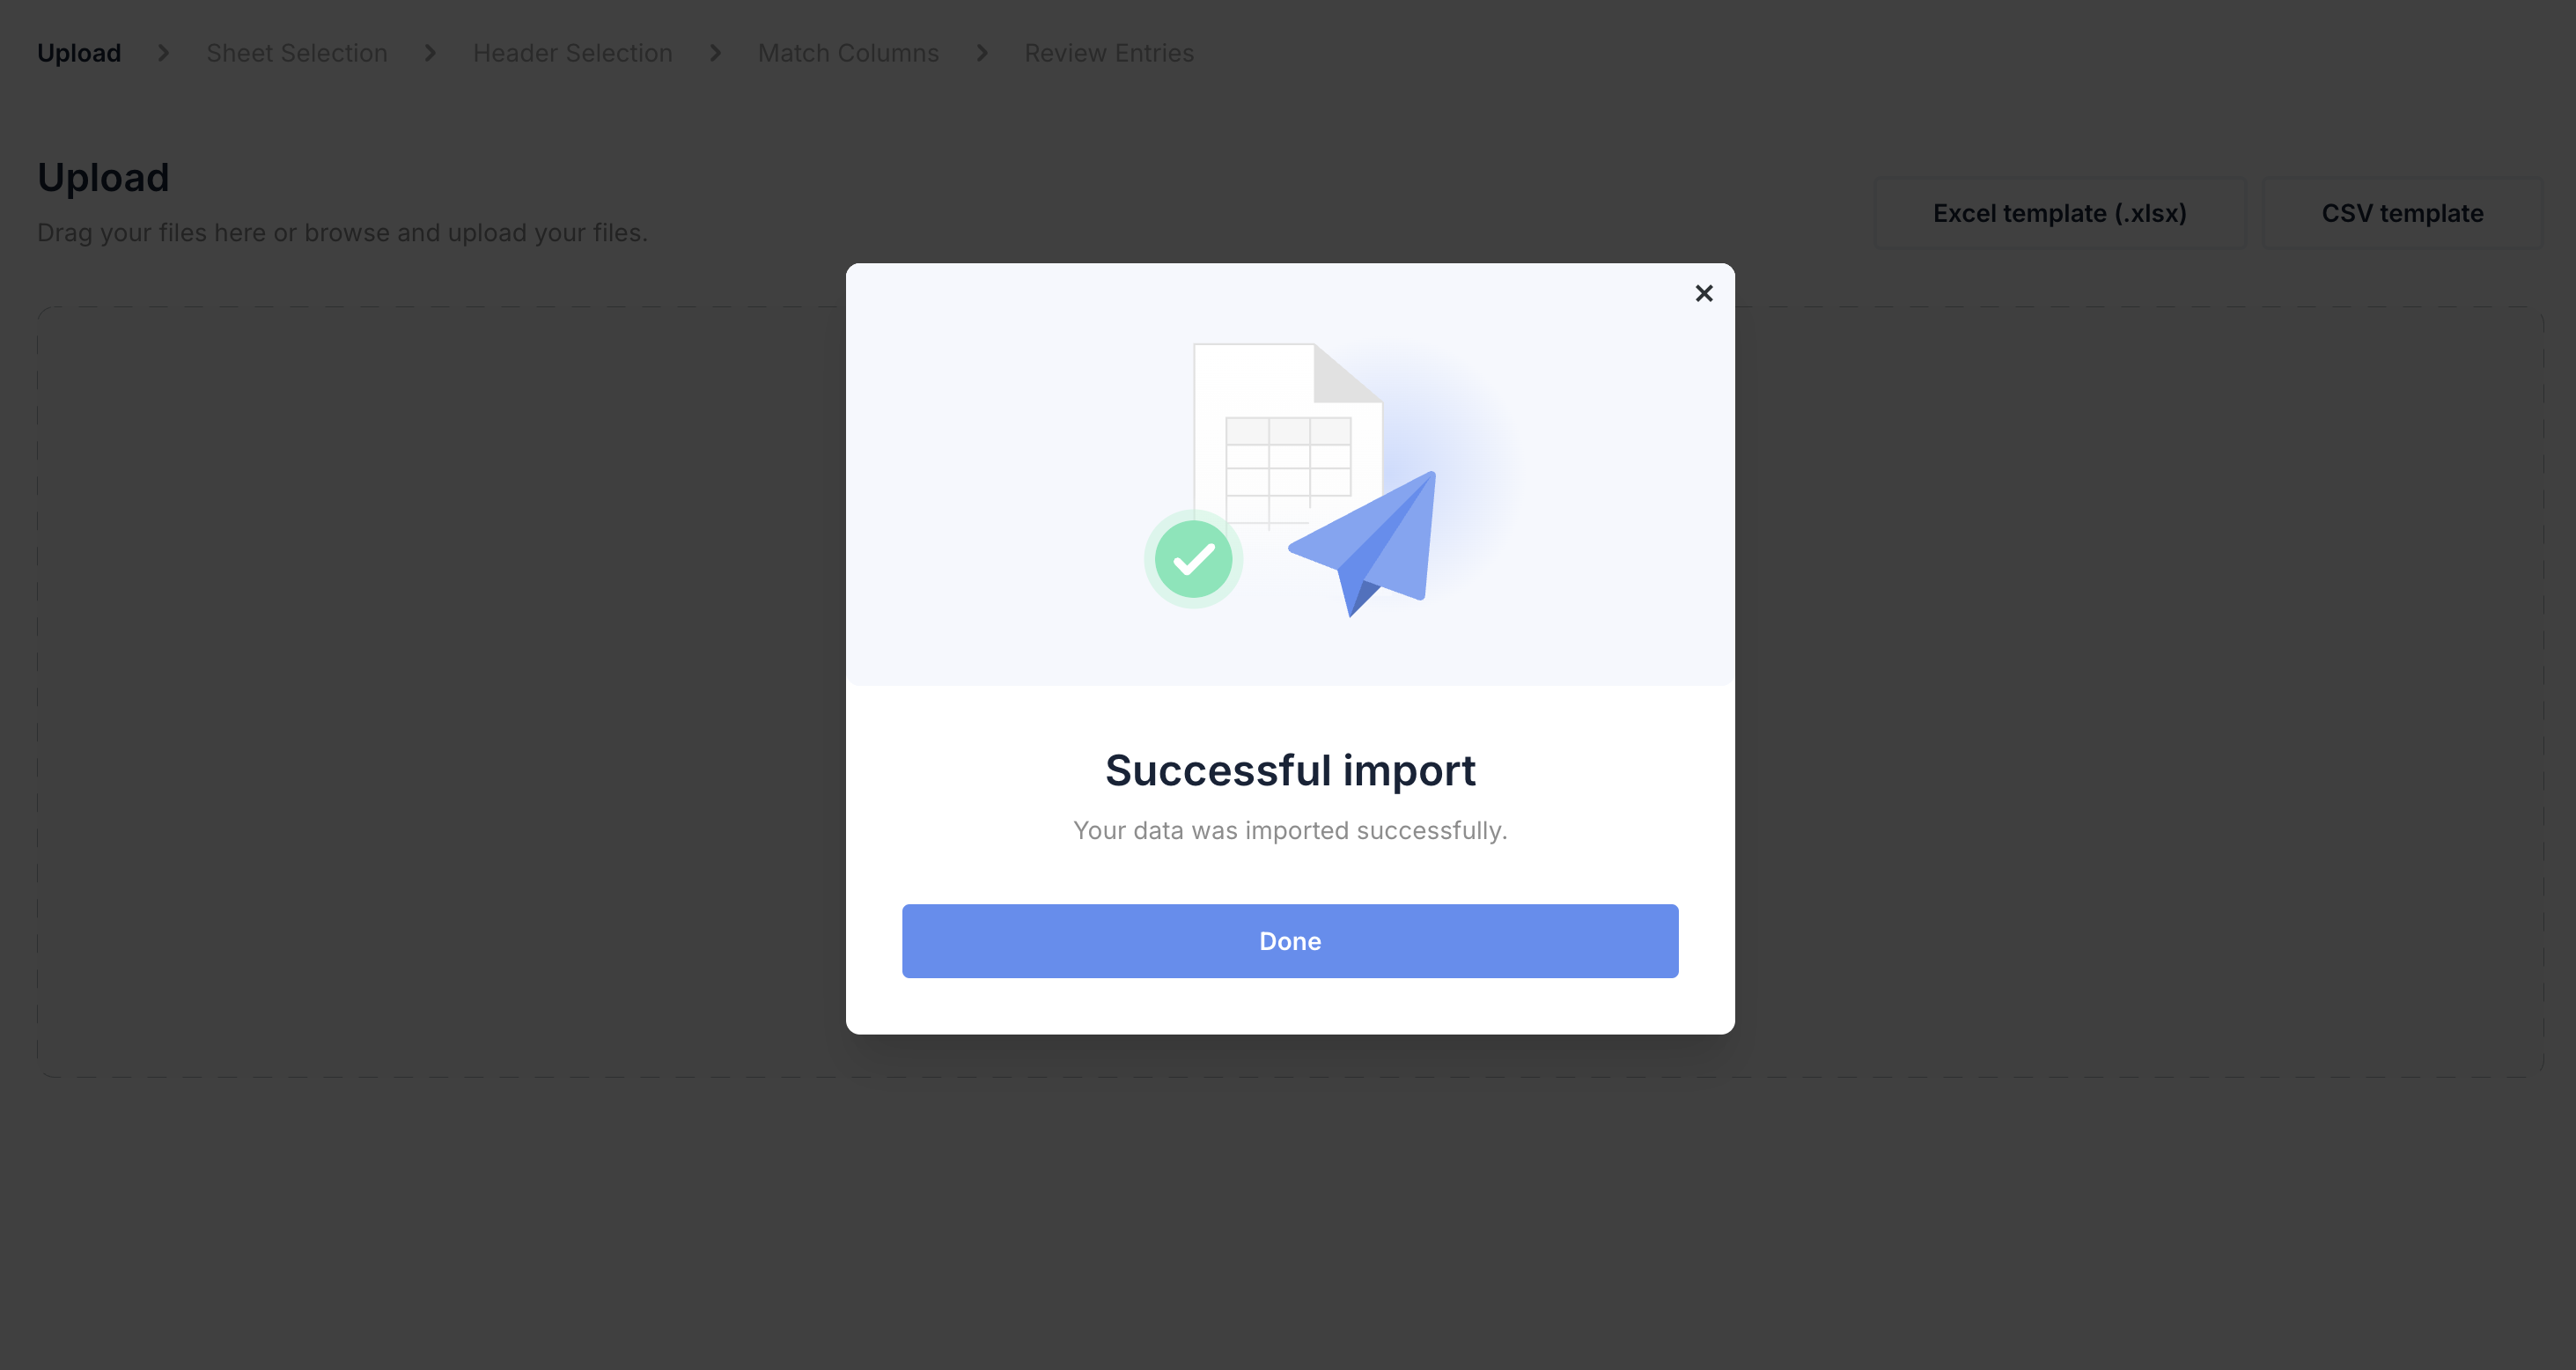
Handling success with complete()
Description:
Function to complete the import process and show the success modal. When called, the import process is successfully completed. You can customize the modal's text using i18nOverrides. Whether the modal is shown and if an import summary appears can be set using successModalConfiguration. The numbers in the import summary are controlled by the parameters listed below, and the animation can be changed or removed via style, just like the rest of the modal. When the "Done" button is pressed, the modal closes and the users sees the initial upload step.
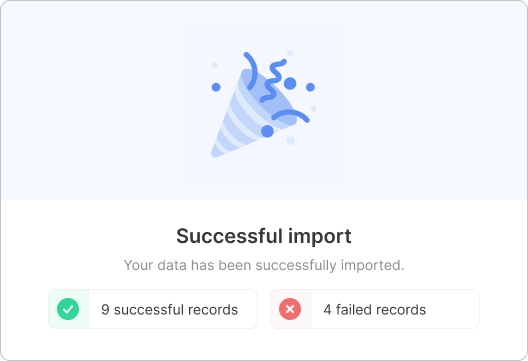
Success modal:
Parameters:
- importedRows: Number of successfully imported rows (default: length of results array)
- failedRows: Number of failed rows (default: length of errors array when
completeImportActionis"block"or"discard", 0 when"submit")
Example:
onResults={(results, errors, complete, logs, block) => {
  // Complete with custom counts
  complete({
    importedRows: 100,
    failedRows: 5
  });
}}
Examples
Displaying the results, errors and logs in the console
This code snippet shows the results and the errors array logged inside your browser console.
- React
- Angular
- Vue
- JavaScript
<NuvoImporter
  licenseKey="Your License Key"
  settings={{
    developerMode: true,
    identifier: "product_data",
    columns: [
      {
        label: "Product ID",
        key: "product_id",
      },
      {
        label: "Article Name",
        key: "article_name",
      },
    ],
  }}
  onResults={(results, errors, complete, logs, block) => {
    console.log("Results:", results);
    console.log("Error rows:", errors);
    console.log("Logs:", logs);
    complete();
  }}
/>
- Add the nuvo component in the HTML file.
<nuvo-importer [licenseKey]="licenseKey" [settings]="settings" [onResults]="onResults.bind(this)" />
- Define the property in the component file.
licenseKey!: string
settings!: SettingsAPI;

ngOnInit(): void {
  this.licenseKey = "Your License Key"
  this.settings = {
    developerMode: true,
    identifier: "product_data",
    columns: [
      {
        label: "Product ID",
        key: "product_id",
      },
      {
        label: "Article Name",
        key: "article_name",
      },
    ]
  }
}

onResults=(results, errors, complete, logs, block) => {
  console.log("Results:", results);
  console.log("Error rows:", errors);
  console.log("Logs:", logs)
  complete();
}
We're phasing out support for Vue 2. If you're still using Vue 2, you can use "nuvo-vuejs" v2.9 or lower.
- Add the nuvo component inside the
<template>tag in the fileApp.vue.
<template>
  <div id="app">
    <NuvoImporter :settings="settings" :licenseKey="licenseKey" :onResults="onResults" />
  </div>
</template>
- Define the property inside the
<script>tag in the component file.
export default {
  name: "App",
  components: {
    NuvoImporter,
  },
  setup() {
    const settings = {
      developerMode: true,
      identifier: "product_data",
      columns: [
        {
          label: "Product ID",
          key: "product_id",
        },
        {
          label: "Article Name",
          key: "article_name",
        },
      ],
    };
    return { settings };
  },
  data: () => {
    return {
      licenseKey: "Your License Key",
    };
  },
  methods: {
    onResults: (results, errors, complete, logs, block) => {
      console.log("Results:", results);
      console.log("Error rows:", errors);
      console.log("Logs:", logs);
      complete();
    },
  },
};
Our vanilla JS syntax has changed since v2.9. If you use v2.8 or lower, please migrate to the latest version by following our migration guide.
<div class="nuvo-container" />
<script type="module">
  import { launchNuvoImporter } from "nuvo-vanilla-js";

  launchNuvoImporter(".nuvo-container", {
    licenseKey: "Your License Key",
    settings: {
      developerMode: true,
      identifier: "product_data",
      columns: [
        {
          label: "Product ID",
          key: "product_id",
        },
        {
          label: "Article Name",
          key: "article_name",
        },
      ],
    },
    onResults: (results, errors, complete, logs, block) => {
      console.log("Results:", results);
      console.log("Error rows:", errors);
      console.log("Logs:", logs);
      complete();
    },
  });
</script>
Sending the results to an API endpoint
This code snippet shows how to use the function "onResults" to make an API call. This can be used, for example, to send the output of the import process to your backend.
- React
- Angular
- Vue
- JavaScript
<NuvoImporter
  licenseKey="Your License Key"
  settings={{
    developerMode: true,
    identifier: "product_data",
    columns: [
      {
        label: "Product ID",
        key: "product_id",
      },
      {
        label: "Article Name",
        key: "article_name",
      },
    ],
  }}
  onResults={(results, errors, complete, logs, block) => {
    return fetch("https://my-json-server.typicode.com/getnuvo/nuvo/customers", {
      method: "POST",
      headers: {
        "Content-Type": "application/json",
      },
      body: JSON.stringify({
        data: {
          results,
          errors,
        },
      }),
    })
      .then((res) => {
        console.log(res);
        complete();
      })
      .catch((err) => {
        console.log(err);
        block({
          title: "Upload Error",
          description: `Failed to upload data: ${err.message}`,
          closeButton: "Try Again",
        });
      });
  }}
/>
- Add the nuvo component in the HTML file.
<nuvo-importer [licenseKey]="licenseKey" [settings]="settings" [onResults]="onResults.bind(this)" />
- Define the property in the component file.
licenseKey!: string
settings!: SettingsAPI;

ngOnInit(): void {
  this.licenseKey = "Your License Key"
  this.settings = {
    developerMode: true,
    identifier: "product_data",
    columns: [
      {
        label: "Product ID",
        key: "product_id",
      },
      {
        label: "Article Name",
        key: "article_name",
      },
    ]
  }
}

onResults=(results, errors, complete, logs, block) => {
  return fetch('https://my-json-server.typicode.com/getnuvo/nuvo/customers', {
    method: 'POST',
    headers: {
      'Content-Type': 'application/json',
    },
    body: JSON.stringify({
      data: {
        results,
        errors
      },
    }),
  })
    .then(res => {
      console.log(res);
      complete()
    })
    .catch(err => {
      console.log(err);
      block({
        title: "Upload Error",
        description: `Failed to upload data: ${err.message}`,
        closeButton: "Try Again"
      });
    });
}
We're phasing out support for Vue 2. If you're still using Vue 2, you can use "nuvo-vuejs" v2.9 or lower.
- Add the nuvo component inside the
<template>tag in the fileApp.vue.
<template>
  <div id="app">
    <NuvoImporter :settings="settings" :licenseKey="licenseKey" :onResults="onResults" />
  </div>
</template>
- Define the property inside the
<script>tag in the component file.
export default {
  name: "App",
  components: {
    NuvoImporter,
  },
  setup() {
    const settings = {
      developerMode: true,
      identifier: "product_data",
      columns: [
        {
          label: "Product ID",
          key: "product_id",
        },
        {
          label: "Article Name",
          key: "article_name",
        },
      ],
    };
    return { settings };
  },
  data: () => {
    return {
      licenseKey: "Your License Key",
    };
  },
  methods: {
    onResults: (results, errors, complete, logs, block) => {
      return fetch("https://my-json-server.typicode.com/getnuvo/nuvo/customers", {
        method: "POST",
        headers: {
          "Content-Type": "application/json",
        },
        body: JSON.stringify({
          data: {
            results,
            errors,
          },
        }),
      })
        .then((res) => {
          console.log(res);
          complete();
        })
        .catch((err) => {
          console.log(err);
          block({
            title: "Upload Error",
            description: `Failed to upload data: ${err.message}`,
            closeButton: "Try Again",
          });
        });
    },
  },
};
Our vanilla JS syntax has changed since v2.9. If you use v2.8 or lower, please migrate to the latest version by following our migration guide.
<div class="nuvo-container" />
<script type="module">
  import { launchNuvoImporter } from "nuvo-vanilla-js";

  launchNuvoImporter(".nuvo-container", {
    licenseKey: "Your License Key",
    settings: {
      developerMode: true,
      identifier: "product_data",
      columns: [
        {
          label: "Product ID",
          key: "product_id",
        },
        {
          label: "Article Name",
          key: "article_name",
        },
      ],
    },
    onResults: (results, errors, complete, logs, block) => {
      return fetch("https://my-json-server.typicode.com/getnuvo/nuvo/customers", {
        method: "POST",
        headers: {
          "Content-Type": "application/json",
        },
        body: JSON.stringify({
          data: {
            results,
            errors,
          },
        }),
      })
        .then((res) => {
          console.log(res);
          complete();
        })
        .catch((err) => {
          console.log(err);
          block({
            title: "Upload Error",
            description: `Failed to upload data: ${err.message}`,
            closeButton: "Try Again",
          });
        });
    },
  });
</script>
Transforming the results structure
This example shows how the structure of the importer's output can be transformed within the function "onResults". This can be used to rename keys, enrich the data or increase the depth of the output data. Normally, the results array object has a flat hierarchy. So if your backend needs data with a deeper structure, this code snippet could be useful:
- React
- Angular
- Vue
- JavaScript
<NuvoImporter
  licenseKey="Your License Key"
  settings={{
    developerMode: true,
    identifier: "product_data",
    columns: [
      {
        label: "Product ID",
        key: "product_id",
      },
      {
        label: "Article Name",
        key: "article_name",
      },
      {
        label: "Street",
        key: "street",
      },
      {
        label: "Postal Code",
        key: "postal_code",
      },
      {
        label: "City",
        key: "city",
      },
    ],
  }}
  onResults={(results, errors, complete, logs, block) => {
    const targetOutput = results.map((item) => {
      return {
        product_id: item?.product_id ?? "default value id",
        article_name: item?.article_name ?? "default value article name",
        production_address: {
          street: item?.street ?? "default value street",
          postal_code: item?.postal_code ?? "default value code",
          city: item?.city ?? "default value city",
        },
      };
    });

    console.log("Results: ", results);
    console.log("Errors: ", errors);
    console.log("Logs:", logs);
    console.log("Target output: ", targetOutput);
    complete();
  }}
/>
- Add the nuvo component in the HTML file.
<nuvo-importer [licenseKey]="licenseKey" [settings]="settings" [onResults]="onResults.bind(this)" />
- Define the property in the component file.
licenseKey!: string
settings!: SettingsAPI;

ngOnInit(): void {
  this.licenseKey = "Your License Key"
  this.settings = {
    developerMode: true,
    identifier: "product_data",
    columns: [
      {
        label: "Product ID",
        key: "product_id",
      },
      {
        label: "Article Name",
        key: "article_name",
      },
      {
        label: "Street",
        key: "street",
      },
      {
        label: "Postal Code",
        key: "postal_code",
      },
      {
        label: "City",
        key: "city",
      },
    ]
  }
}

onResults=(results, errors, complete, logs, block) => {
  const targetOutput = results.map(item => {
    return {
      product_id: item?.product_id ?? "default value id",
      article_name: item?.article_name ?? "default value article name",
      production_address: {
        street: item?.street ?? "default value street",
        postal_code: item?.postal_code ?? "default value code",
        city: item?.city ?? "default value city",
      },
    };
  });

  console.log("Results: ", results);
  console.log("Errors: ", errors);
  console.log("Logs:", logs)
  console.log("Target output: ", targetOutput);
  complete()
}
We're phasing out support for Vue 2. If you're still using Vue 2, you can use "nuvo-vuejs" v2.9 or lower.
- Add the nuvo component inside the
<template>tag in the fileApp.vue.
<template>
  <div id="app">
    <NuvoImporter :settings="settings" :licenseKey="licenseKey" :onResults="onResults" />
  </div>
</template>
- Define the property inside the
<script>tag in the component file.
export default {
  name: "App",
  components: {
    NuvoImporter,
  },
  setup() {
    const settings = {
      developerMode: true,
      identifier: "product_data",
      columns: [
        {
          label: "Product ID",
          key: "product_id",
        },
        {
          label: "Article Name",
          key: "article_name",
        },
        {
          label: "Street",
          key: "street",
        },
        {
          label: "Postal Code",
          key: "postal_code",
        },
        {
          label: "City",
          key: "city",
        },
      ],
    };
    return { settings };
  },
  data: () => {
    return {
      licenseKey: "Your License Key",
    };
  },
  methods: {
    onResults: (results, errors, complete, logs, block) => {
      const targetOutput = results.map((item) => {
        return {
          product_id: item?.product_id ?? "default value id",
          article_name: item?.article_name ?? "default value article name",
          production_address: {
            street: item?.street ?? "default value street",
            postal_code: item?.postal_code ?? "default value code",
            city: item?.city ?? "default value city",
          },
        };
      });

      console.log("Results: ", results);
      console.log("Errors: ", errors);
      console.log("Logs:", logs);
      console.log("Target output: ", targetOutput);
      complete();
    },
  },
};
Our vanilla JS syntax has changed since v2.9. If you use v2.8 or lower, please migrate to the latest version by following our migration guide.
<div class="nuvo-container" />
<script type="module">
  import { launchNuvoImporter } from "nuvo-vanilla-js";

  launchNuvoImporter(".nuvo-container", {
    licenseKey: "Your License Key",
    settings: {
      developerMode: true,
      identifier: "product_data",
      columns: [
        {
          label: "Product ID",
          key: "product_id",
        },
        {
          label: "Article Name",
          key: "article_name",
        },
      ],
    },
    onResults: (results, errors, complete, logs, block) => {
      const targetOutput = results.map((item) => {
        return {
          product_id: item?.product_id ?? "default value id",
          article_name: item?.article_name ?? "default value article name",
          production_address: {
            street: item?.street ?? "default value street",
            postal_code: item?.postal_code ?? "default value code",
            city: item?.city ?? "default value city",
          },
        };
      });

      console.log("Results: ", results);
      console.log("Errors: ", errors);
      console.log("Logs:", logs);
      console.log("Target output: ", targetOutput);
      complete();
    },
  });
</script>
Download results data as csv
This code snippet triggers a download of the cleaned data as a CSV file once the import is complete (it is possible to do the same for the download of an XLSX file). Please note that you need to install the FileSaver.js library for the code snippet to work:
- React
- Angular
- Vue
- JavaScript
import { saveAs } from "file-saver";

<NuvoImporter
  licenseKey="Your License Key"
  settings={{
    developerMode: true,
    identifier: "product_data",
    columns: [
      {
        label: "Product ID",
        key: "product_id",
      },
      {
        label: "Article Name",
        key: "article_name",
      },
      {
        label: "Street",
        key: "street",
      },
      {
        label: "Postal Code",
        key: "postal_code",
      },
      {
        label: "City",
        key: "city",
      },
    ],
  }}
  onResults={(results, errors, complete, logs, block) => {
    if (results.length > 0) {
      const headers = Object.keys(results[0]).map((key) => key);
      const body = [];
      results.forEach((row, rowIndex) => {
        headers.forEach((key) => {
          const value = String(row[key] ?? " ").replace(",", "‚");
          if (body[rowIndex]) {
            body[rowIndex].push(value);
          } else {
            body[rowIndex] = [value];
          }
        });
      });
      const content = [
        headers.join(","),
        body
          .map((row) => {
            return row.join(",");
          })
          .join("\r\n"),
      ].join("\r\n");

      // "saveAs" is a function for download file from "file-saver" library
      // you can see how to install from this link
      // https://github.com/eligrey/FileSaver.js/
      saveAs(new Blob([content], { type: "text/csv;charset=utf-8;" }), "results.csv");
    }
    complete();
  }}
/>;
- Add the nuvo component in the HTML file.
<nuvo-importer [licenseKey]="licenseKey" [settings]="settings" [onResults]="onResults.bind(this)" />
- Define the property in the component file.
licenseKey!: string
settings!: SettingsAPI;

ngOnInit(): void {
  this.licenseKey = "Your License Key"
  this.settings = {
    developerMode: true,
    identifier: "product_data",
    columns: [
      {
        label: "Product ID",
        key: "product_id",
      },
      {
        label: "Article Name",
        key: "article_name",
      },
    ]
  }
}

onResults = (results, errors, complete, logs, block) => {
  if (results.length > 0) {
    const headers = Object.keys(results[0]).map((key) => key);
    const body = [];
    results.forEach((row, rowIndex) => {
      headers.forEach((key) => {
        const value = String(row[key] ?? " ").replace(",", "‚");
        if (body[rowIndex]) {
          body[rowIndex].push(value);
        } else {
          body[rowIndex] = [value];
        }
      });
    });
    const content = [
      headers.join(","),
      body
        .map((row) => {
          return row.join(",");
        })
        .join("\r\n"),
    ].join("\r\n");

    // "saveAs" is a function for download file from "file-saver" library
    // you can see how to install from this link
    // https://github.com/eligrey/FileSaver.js/
    saveAs(
      new Blob([content], { type: "text/csv;charset=utf-8;" }),
      "results.csv"
    );
  }
  complete();
};
We're phasing out support for Vue 2. If you're still using Vue 2, you can use "nuvo-vuejs" v2.9 or lower.
- Add the nuvo component inside the
<template>tag in the fileApp.vue.
<template>
  <div id="app">
    <NuvoImporter :settings="settings" :licenseKey="licenseKey" :onResults="onResults" />
  </div>
</template>
- Define the property inside the
<script>tag in the component file.
export default {
  name: "App",
  components: {
    NuvoImporter,
  },
  setup() {
    const settings = {
      developerMode: true,
      identifier: "product_data",
      columns: [
        {
          label: "Product ID",
          key: "product_id",
        },
        {
          label: "Article Name",
          key: "article_name",
        },
      ],
    };
    return { settings };
  },
  data: () => {
    return {
      licenseKey: "Your License Key",
    };
  },
  methods: {
    onResults: (results, errors, complete, logs, block) => {
      if (results.length > 0) {
        const headers = Object.keys(results[0]).map((key) => key);
        const body = [];
        results.forEach((row, rowIndex) => {
          headers.forEach((key) => {
            const value = String(row[key] ?? " ").replace(",", "‚");
            if (body[rowIndex]) {
              body[rowIndex].push(value);
            } else {
              body[rowIndex] = [value];
            }
          });
        });
        const content = [
          headers.join(","),
          body
            .map((row) => {
              return row.join(",");
            })
            .join("\r\n"),
        ].join("\r\n");

        // "saveAs" is a function for download file from "file-saver" library
        // you can see how to install from this link
        // https://github.com/eligrey/FileSaver.js/
        saveAs(new Blob([content], { type: "text/csv;charset=utf-8;" }), "results.csv");
      }
      complete();
    },
  },
};
Our vanilla JS syntax has changed since v2.9. If you use v2.8 or lower, please migrate to the latest version by following our migration guide.
<div class="nuvo-container" />
<script type="module">
  import { launchNuvoImporter } from "nuvo-vanilla-js";

  launchNuvoImporter(".nuvo-container", {
    licenseKey: "Your License Key",
    settings: {
      developerMode: true,
      identifier: "product_data",
      columns: [
        {
          label: "Product ID",
          key: "product_id",
        },
        {
          label: "Article Name",
          key: "article_name",
        },
      ],
    },
    onResults: (results, errors, complete, logs, block) => {
      if (results.length > 0) {
        const headers = Object.keys(results[0]).map((key) => key);
        const body = [];
        results.forEach((row, rowIndex) => {
          headers.forEach((key) => {
            const value = String(row[key] ?? " ").replace(",", "‚");
            if (body[rowIndex]) {
              body[rowIndex].push(value);
            } else {
              body[rowIndex] = [value];
            }
          });
        });
        const content = [
          headers.join(","),
          body
            .map((row) => {
              return row.join(",");
            })
            .join("\r\n"),
        ].join("\r\n");

        // "saveAs" is a function for download file from "file-saver" library
        // you can see how to install from this link
        // https://github.com/eligrey/FileSaver.js/
        saveAs(new Blob([content], { type: "text/csv;charset=utf-8;" }), "results.csv");
      }
      complete();
    },
  });
</script>
Deprecated
RejectSubmitResult (deprecated)
| Description | This enables you to inform the user that their submitted data has been rejected for whatever reason |
| Run event | The execution of this function occurs when it is called inside complete() of the onResults function |
| Parameter | RejectSubmitResult(): This function accepts two parameters:
|
| Example |
onResults={(results, errors, complete, logs) => {
  console.log("Results:", results)
  console.log("Error rows:", errors)
  console.log("Logs:", logs)
  complete(new RejectSubmitResult("Error title", "Your customized error text."));
}}
RejectSubmitResult has been deprecated since version 3.3.0. Please use the new block() function instead which provides the same functionality with a more flexibility.
PassSubmitResult (deprecated)
| Description | This enables you to inform the user that their import was successful, and you can provide additional information about the number of successful and rejected entries |
| Run event | The execution of this function occurs when it is called inside complete() of the onResults function |
| Parameter | PassSubmitResult(): This function accepts six parameters:
|
| Example | In this following example, we show you how you can customize the success modal and show additional information |
onResults={(results, errors, complete, logs) => {
  console.log("Results:", results)
  console.log("Error rows:", errors)
  console.log("Logs:", logs)
  complete(
    new PassSubmitResult({
      successfulRecords: 10,
      failedRecords: 5,
      title: 'Your customized title',
      text: 'Your customized text.',
      imageUrl: 'Your image url',
      duration: 3000
    })
  );
}}
PassSubmitResult has been deprecated since version 3.3.0. Please use the new complete() function with importedRows and failedRows parameters instead. Use the successModalConfiguration setting to customize the success modal appearance.